FEM mounting system with adjustable angle of inclination
Assembly Stages:
- Assembly of triangles.
- Positioning of triangles.
- Installation of the profile along the structure.
- Installation of FEM on the structure.
System Details:
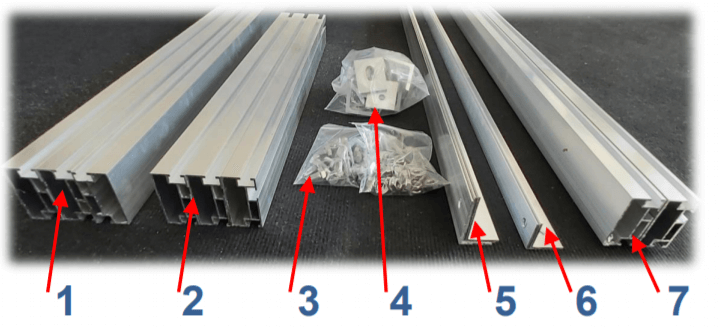
- Triangle crossbar (SPL-4 profile)
- Triangle support (SPL-4 profile)
- Fasteners
- Brackets
- Triangle base (angle 50*30*2)
- Diagonal (angle 30*30*2)
- Profile for laying FEM (SPL-4 profile)
Triangle Assembly
The triangle consists of:
- Crossbar (SPL-4 profile) – 1 pc;
- Support (SPL-4 profile) – 1 pc;
- Base (angle 50*30*2) – 1 pc;
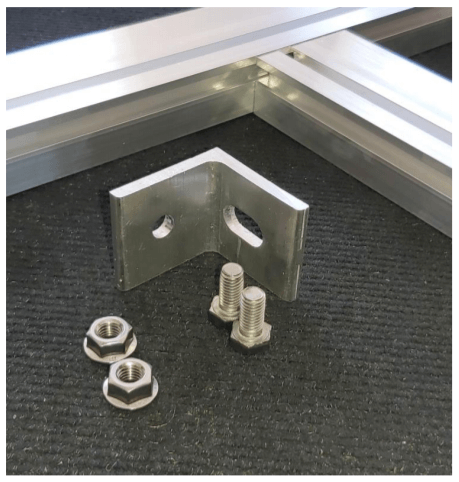
- Bracket – 3 pcs;
- Bolt DIN 933 A2 M8*16 – 8 pcs;
- Nut DIN6923 A2 M8 – 8 pcs.
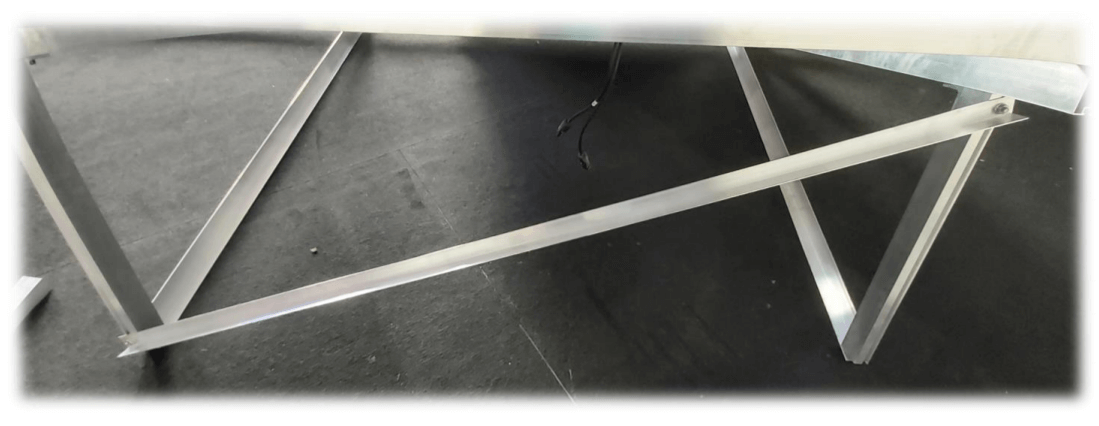
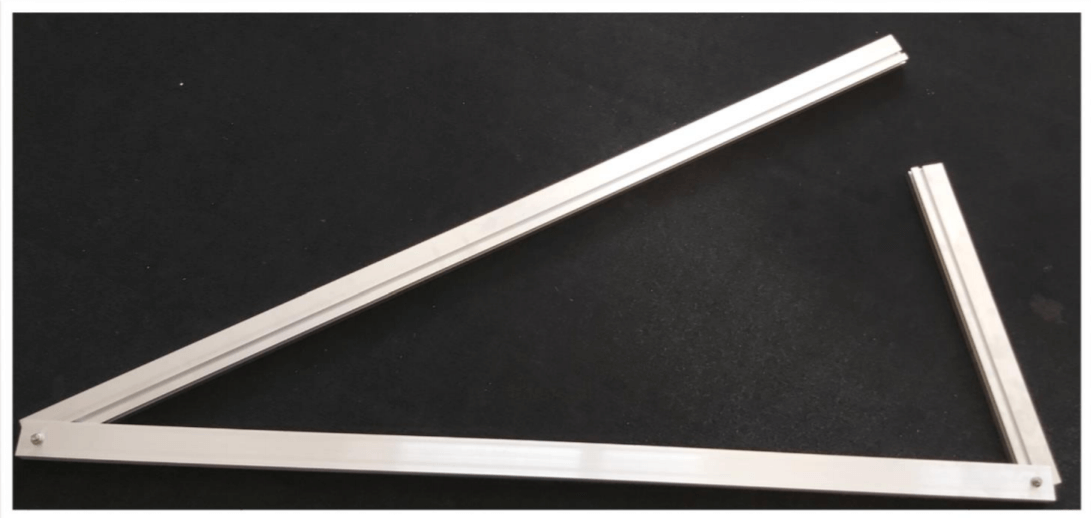
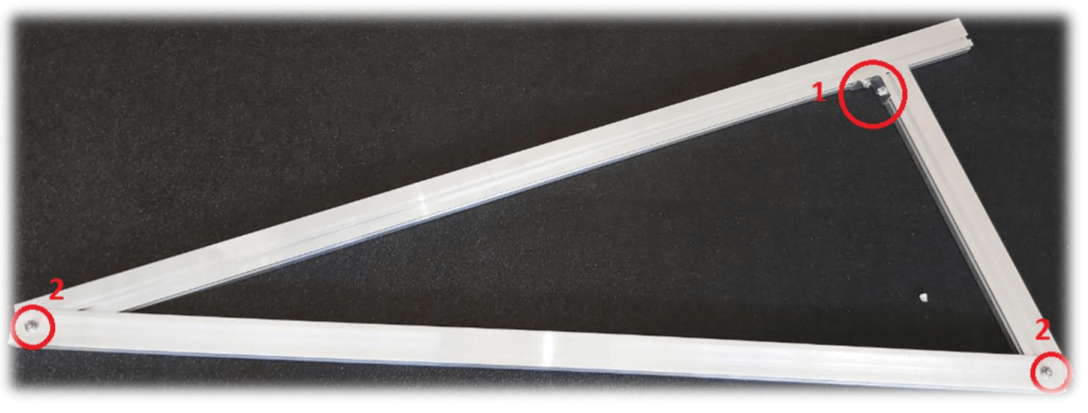
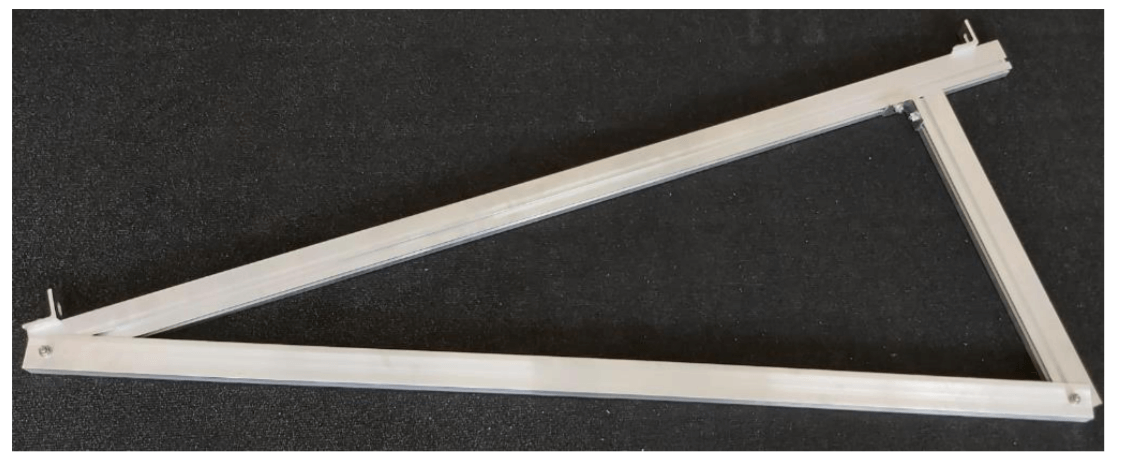
Assembled Triangle

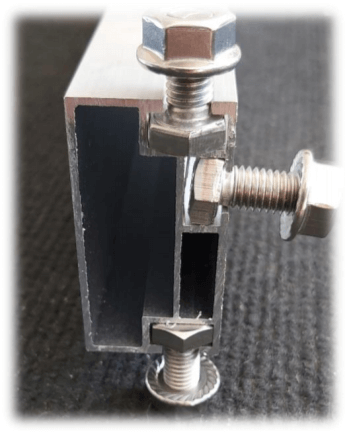
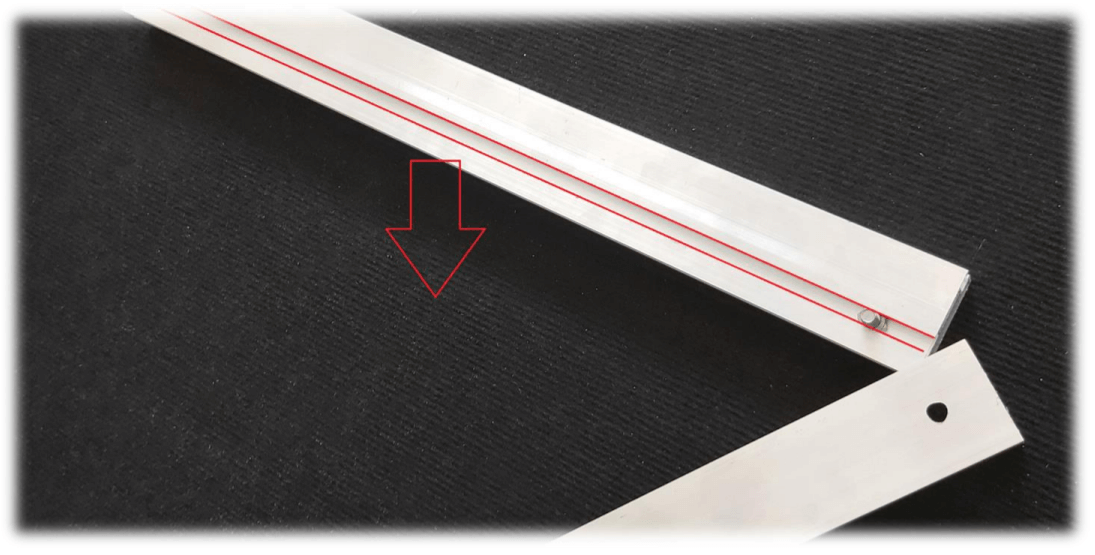
All connections in the system are bolted, using standard M8 DIN 933 bolts. The bolt head freely enters the groove of the SPL-4 profile and moves along it. Due to the specific width of the profile, the bolt head is securely fixed in the groove, and the bolt does not rotate around its axis. This allows the use of a single 13 mm wrench during assembly.
For triangle assembly:
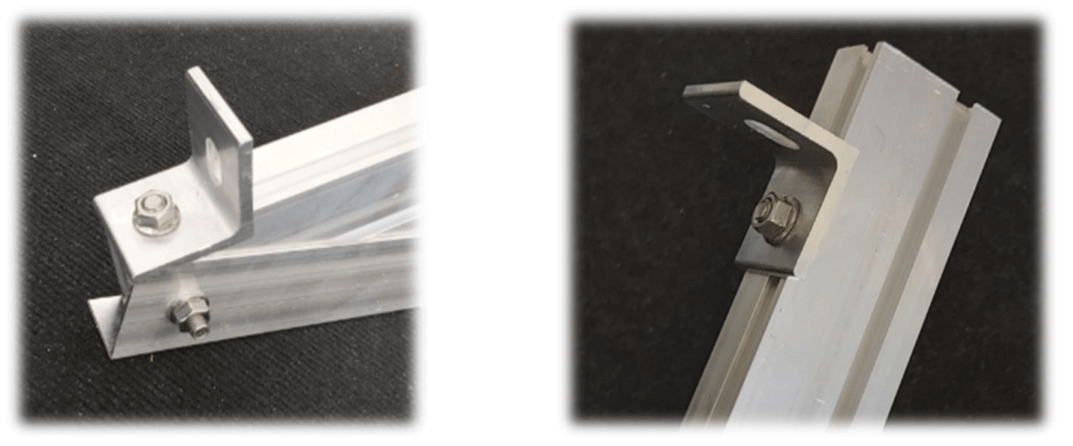
Insert bolt DIN 933 A2 M8*16 into the side groove of the support, tighten it approximately to the mounting position (~1cm)

Attach the base (angle 50*30*2) to the bolt with nut DIN6923 A2 M8 (do not tighten). The holes in the base are made symmetrically, so it does not matter which side of the base is attached.
Important: the side groove in the support must be oriented downward, towards the base!
Repeat the same steps to attach the crossbar to the base.
Now connect the crossbar and the support.
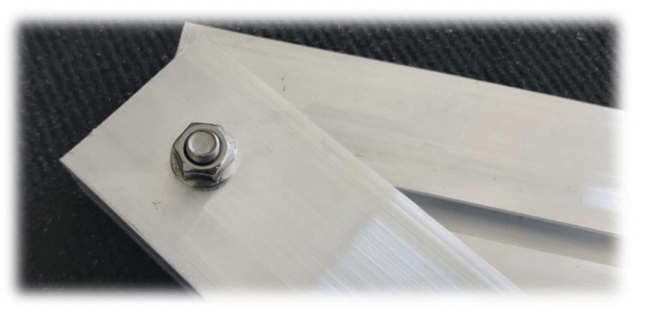
To do this, place the base and the support perpendicular to each other and connect them with a bracket and two M8*16 bolts and two M8 DIN6923 nuts (with flange).
It is important to tighten the bolts evenly and hold the crossbar while tightening the nut that secures the bracket to the support, to prevent the crossbar from turning.
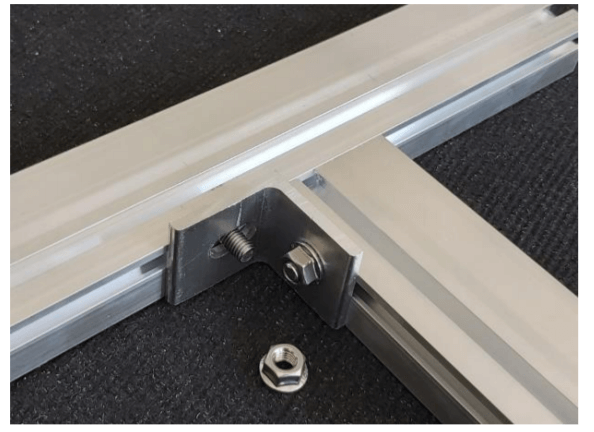
After tightening the bolts on the bracket connecting the crossbar and the support, tighten the nuts securing the crossbar and support to the base (the nuts were previously threaded, see above).
Sequence of tightening bolt connections.
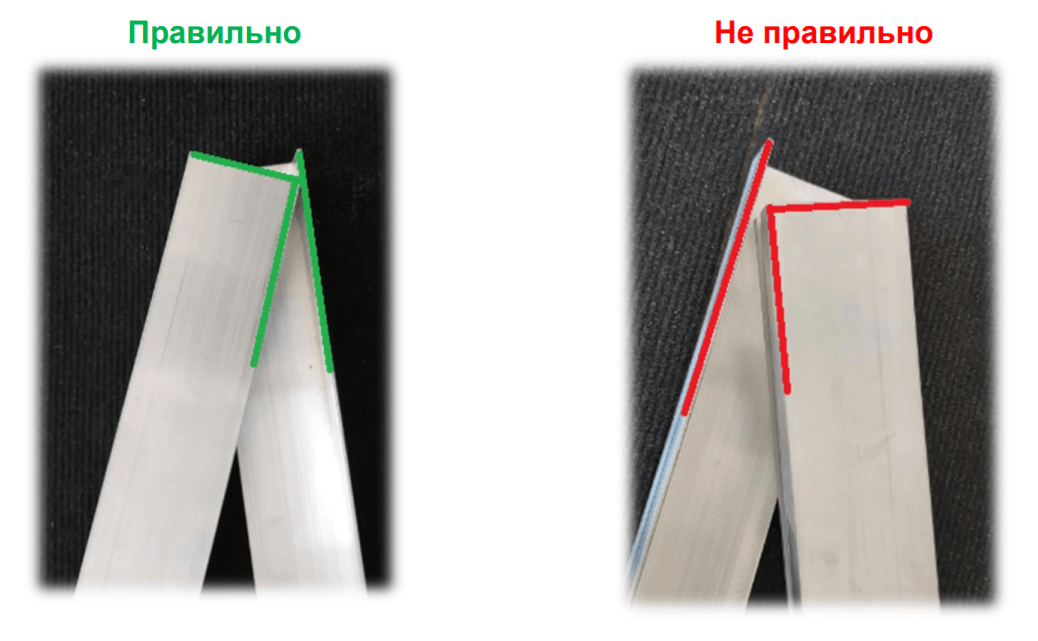
Important: when assembling triangles, make sure that the base and the support fit snugly to the base!
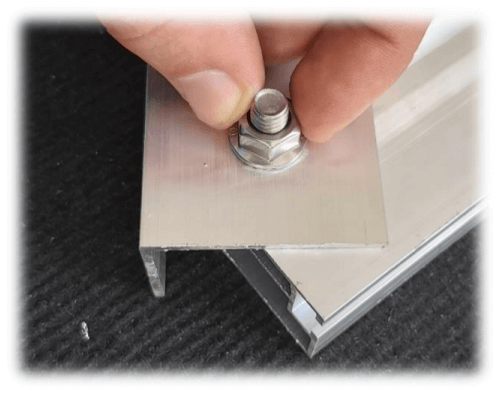
Attach brackets to the triangle crossbar (on the edges). The bracket must be attached to the triangle through the round hole! This is important because the groove will be used for profile mounting.
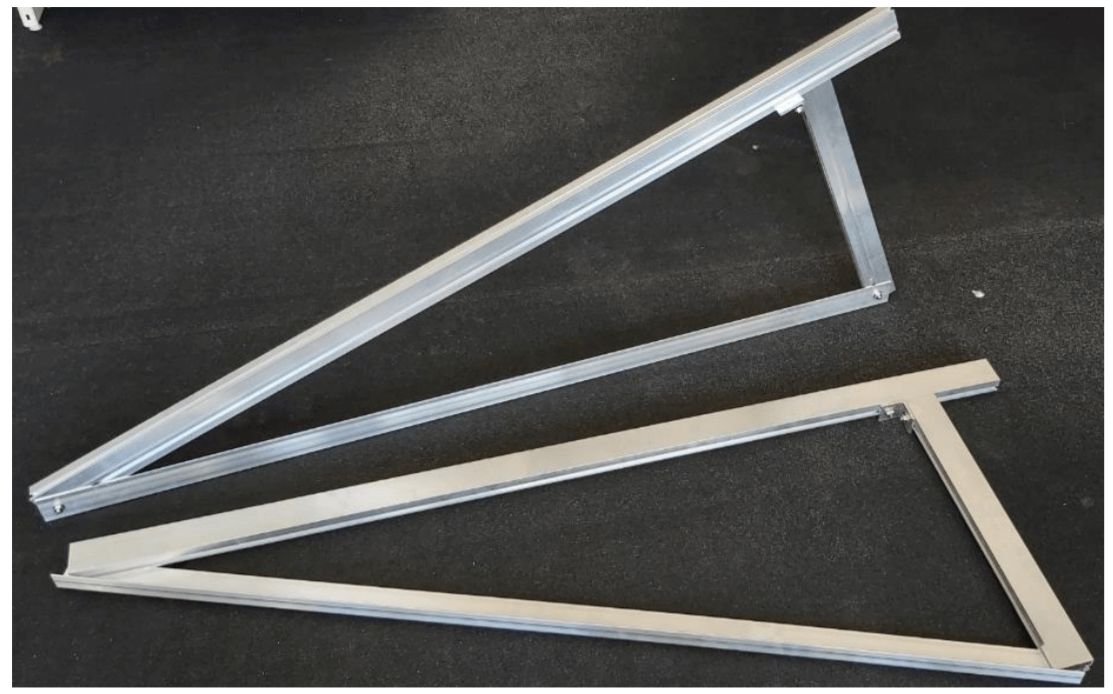
Important: triangles can be assembled symmetrically (mirrored) in relation to each other, to place ballast between the bases of the triangles, which will face each other with the flanges!
After assembling the triangles, attach the rail along them.
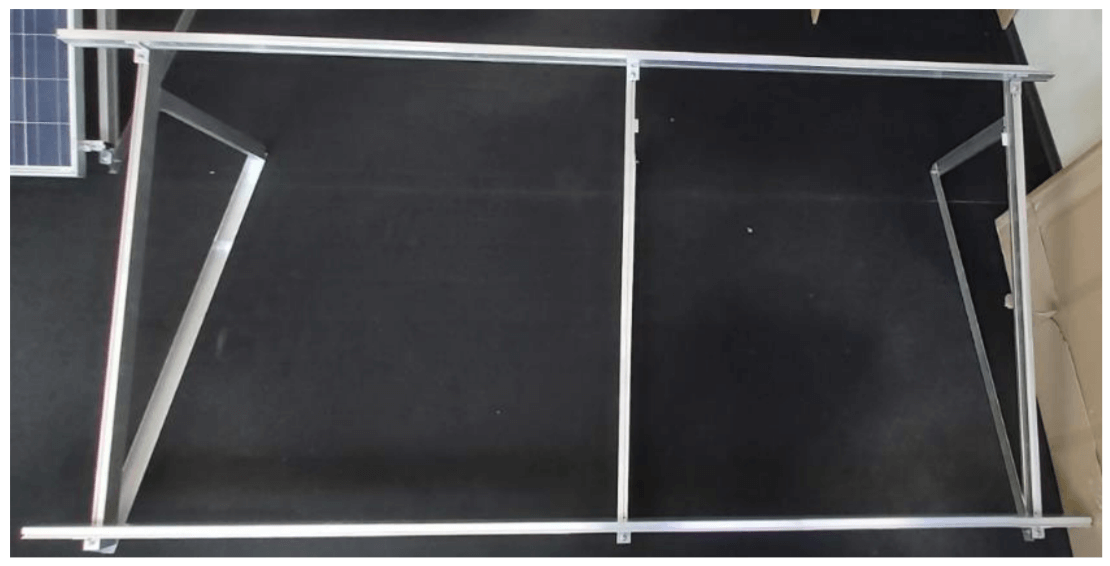
To connect several rails along the length, use the special connectors included in the set.

Diagonals are attached to the triangle supports. The placement of diagonals is according to the scheme.